[ English | português (Brasil) | Esperanto | français | नेपाली | русский | español | English (United Kingdom) | 한국어 (대한민국) | 中文 (简体, 中国) | Indonesia | Deutsch ]
Manage flavours
In OpenStack, a flavour defines the compute, memory, and storage capacity of a virtual server, also known as an instance. As an administrative user, you can create and delete flavours and update their metadata.
As of Newton, there are no default flavours. The following table lists the default flavours for Mitaka and earlier.
Flavour |
vCPUs |
Disk (in GB) |
RAM (in MB) |
|---|---|---|---|
m1.tiny |
1 |
1 |
512 |
m1.small |
1 |
20 |
2048 |
m1.medium |
2 |
40 |
4096 |
m1.large |
4 |
80 |
8192 |
m1.xlarge |
8 |
160 |
16384 |
Create flavours
Log in to the Dashboard and select the admin project from the drop-down list.
In the Admin tab, open the Compute tab and click the Flavours category.
Click Create Flavour.
In the Create Flavour window, enter or select the parameters for the flavour in the Flavour Information tab.
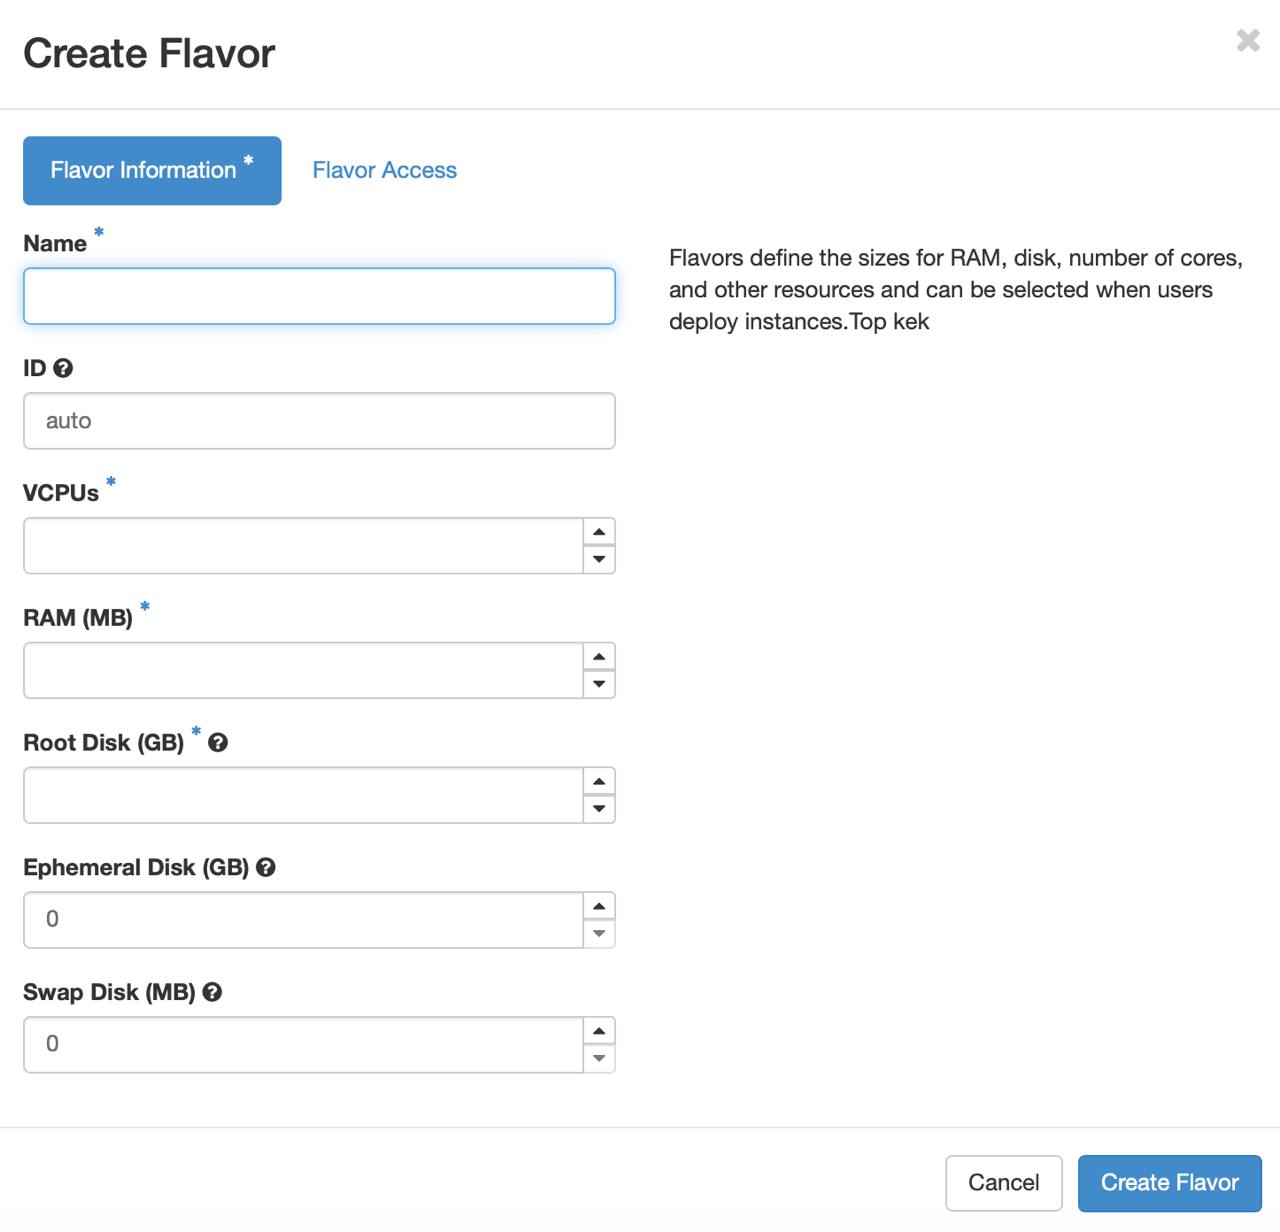
Dashboard — Create Flavour
Name
Enter the flavour name.
ID
Unique ID (integer or UUID) for the new flavour. If specifying ‘auto’, a UUID will be automatically generated.
vCPUs
Enter the number of virtual CPUs to use.
RAM (MB)
Enter the amount of RAM to use, in megabytes.
Root Disk (GB)
Enter the amount of disk space in gigabytes to use for the root (/) partition.
Ephemeral Disk (GB)
Enter the amount of disk space in gigabytes to use for the ephemeral partition. If unspecified, the value is 0 by default.
Ephemeral disks offer machine local disk storage linked to the lifecycle of a VM instance. When a VM is terminated, all data on the ephemeral disk is lost. Ephemeral disks are not included in any snapshots.
Swap Disk (MB)
Enter the amount of swap space (in megabytes) to use. If unspecified, the default is 0.
In the Flavour Access tab, you can control access to the flavour by moving projects from the All Projects column to the Selected Projects column.
Only projects in the Selected Projects column can use the flavour. If there are no projects in the right column, all projects can use the flavour.
Click Create Flavour.
Update Metadata
Log in to the Dashboard and select the admin project from the drop-down list.
In the Admin tab, open the Compute tab and click the Flavours category.
Select the flavour that you want to update. In the drop-down list, click Update Metadata or click No or Yes in the Metadata column.
In the Update Flavour Metadata window, you can customise some metadata keys, then add it to this flavour and set them values.
Click Save.
Optional metadata keys
CPU limits
quota:cpu_shares
quota:cpu_period
quota:cpu_limit
quota:cpu_reservation
quota:cpu_quota
Disk tuning
quota:disk_read_bytes_sec
quota:disk_read_iops_sec
quota:disk_write_bytes_sec
quota:disk_write_iops_sec
quota:disk_total_bytes_sec
quota:disk_total_iops_sec
Bandwidth I/O
quota:vif_inbound_average
quota:vif_inbound_burst
quota:vif_inbound_peak
quota:vif_outbound_average
quota:vif_outbound_burst
quota:vif_outbound_peak
Watchdog behaviour
hw:watchdog_action
Random-number generator
hw_rng:allowed
hw_rng:rate_bytes
hw_rng:rate_period
For information about supporting metadata keys, see the the Compute service documentation.
Delete flavours
Log in to the Dashboard and select the admin project from the drop-down list.
In the Admin tab, open the Compute tab and click the Flavours category.
Select the flavours that you want to delete.
Click Delete Flavours.
In the Confirm Delete Flavours window, click Delete Flavours to confirm the deletion. You cannot undo this action.
